Patchwork Cushion Tutorial
This is a simple tutorial on how to create your own patchworks from preloved fabric and scraps that would otherwise be discarded.
There is a lot of discussion about the amount of textile waste going to landfill. Before the introduction of mass produced items, we had to make everything from scratch, mend and recycle purely out of necessity. Many of us are working towards more sustainable practices and natural dyeing, recycling, up cycling textiles is one way to re-decorate without having to buy new cushions and fabric.
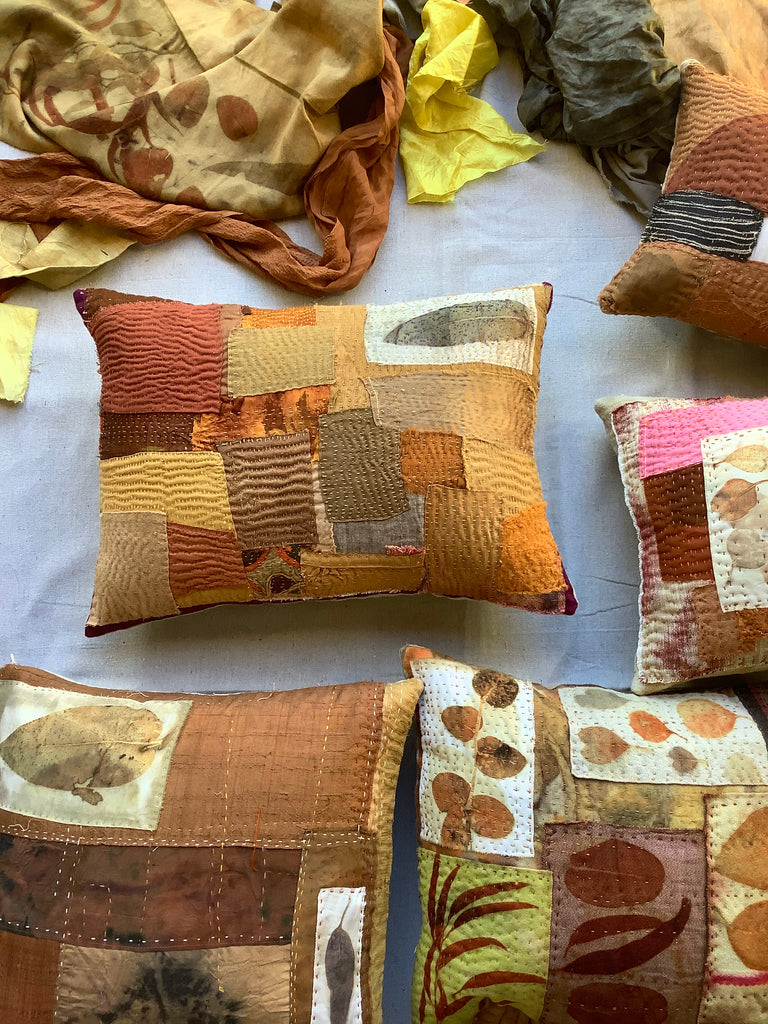
The pieces have been dyed using local eucalyptus leaves, bark harvested in my neighbourhood, onion skin and flowers from my garden.
If you aren’t a sewer, the charity and secondhand stores often have a good selection of cushions for a few dollars. You can give them a new life by creating patchworks and stitching over the top of an old one.
Please remember, there is not one particular way of doing this patchwork, it is all about your personal choice and style.
Step 1
Gather and select your dyed fabric and remnants. For the tutorial, I have selected eucalyptus and natural dyed fabrics of cotton, hemp, linen, silk and wool. There are pieces of preloved Indian sari and hand woven Lao textiles in an earthy colour palette, but you can choose what ever colours you wish.


Step 2
In the image below you will notice that I have cut out calico that is the size and shape of my cushion. I will then arrange my pieces to fit the rectangular fabric. The piece of calico will make it easier for me to place t the fabric scraps onto. When I'm finished I will simply lift the single piece and sew it on top of the cushion cover.

In the image below, I have folded and ironed some of the pieced so the threads will not unravel but also to mix up the design and texture of the cushion cover.

A close up of folded and ironed silk squares.

Step 3
Place the pieces on to the calico and arrange into pattern or composition that you are happy with. Pin the fabric together to hold it in place and it is ready for stitching. Another option is to sew the fabric in place loosely and remove the thread afterwards.

Step 4
This is the linen cushion cover that Im using to give it a new life. The calico from the image above in Step 3 will be lifted on top of the linen cushion cover.

Step 5
Now that the piece of calico with my fabric design has been placed on top of the linen, it is ready for stitching. You will see in the image below that a wooden board has been placed in between the fabric. This is to stop the cushion being sewn together! Now to start! Find a corner and begin stitching the pieces together. I have only used the simple running stitch. I am using several types of thread for the stitching, cotton/silk blend thread, sashiko thread and wool thread.


Step 6
The stitching is almost complete. The loose threads have been cut. An insert is placed inside to show where bubbles and faults may be seen, Make sure the edges have been stitched to firmly hold the fabric in place.


The finished product! Gently iron once you have finished for an even surface and cut off any loose threads. Place a cushion insert inside and its ready for the world.
